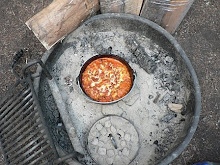
After a long day at work, we were ready to put this bread together, bake it in the Dutch oven and serve it up with the Venison Chili that had been cooking all day long in the crock-pot. So, we were sure disappointed when it started raining- a lot. Too much to make it very easy to cook on the coals.
Luckily, we had recently been given a 10" Lodge Dutch oven without legs. So, I guess the rain gave us an opportunity to bake Dutch Oven Bread inside. Anyway, though this site is mostly dedicated to outdoor cooking, we make the rules! :-)
Dutch Oven Garlic Herb Bread
10" Dutch Oven
Preheated Indoor Oven: 350°
1 cup warm water
1 teaspoon white sugar
1 teaspoon active dry yeast
4 cups all purpose flour
1/4 cup melted butter
2 cloves garlic, minced
1 teaspoon dried basil
1 teaspoon dried oregano
2 teaspoons salt
Olive Oil
Coarse Salt
Combine yeast, sugar, and warm water. Let stand 5-10 minutes. In a bowl combine yeast mixture, 3 to 3 1/2 flour, melted butter, garlic, basil, oregano, and 2 teaspoons salt. Mix until you can work it with your hands. Knead the dough, being sure to add all of the remaining flour. Continue kneading until the dough is smooth and elastic. Shape into a ball and place in an oiled bowl, turning once.
Place a thin towel over the bowl and allow to rise in a warm place until doubled in size, about 1 hour. Punch down dough and turn out onto a floured surface to rest for 5 minutes. Meanwhile, lightly oil the inside of the Dutch oven. Shape dough into a ball, being sure to make the top smooth. Place in prepared D.O. and make an "X" in the top.
Brush with olive oil and sprinkle the top with coarse salt. Place the lid on top and bake in preheated oven for 30-40 minutes. Remove lid and bake an additional 15 minutes or so until is sounds hollow when tapped with a finger. Voila!
~Erin
Chinese Scallion Pancakes
6 years ago


Matt & Erin:
ReplyDeleteI made a Dutch oven umbrella a few years ago. 2/6/10 I posted photos of it. Take a look. It works well in rain or snow.
Ron Clanton